•The Schedule Saved Report Section
The Saved Reports|Parameters Page displays the parameters for the saved report. The criteria within the parameters pages are all varied and specific to each report. The parameter information can be edited and viewed within this page. For more information, refer to Core Reports.
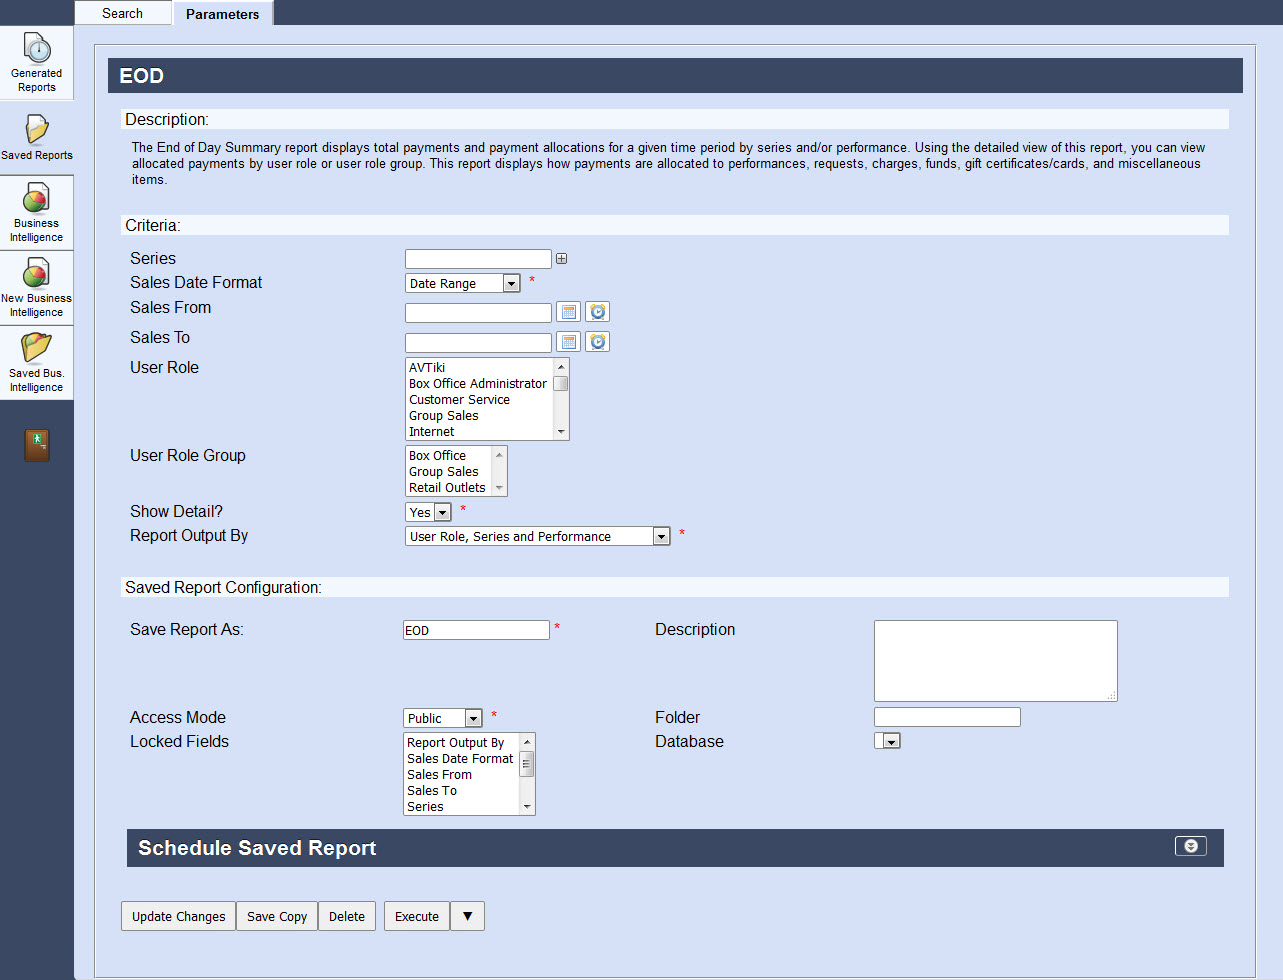
The following image illustrates the Business Intelligence and Reports - Saved Reports|Parameters page for the End of Day Summary Report:
The Saved Report Section
The Saved Report Configuration section enables you to save the criteria you have selected for the report. Saved reports appear on the Saved Reports|Reports page.
The following image illustrates the Saved Report Configuration section of the Saved Reports|Parameters page:
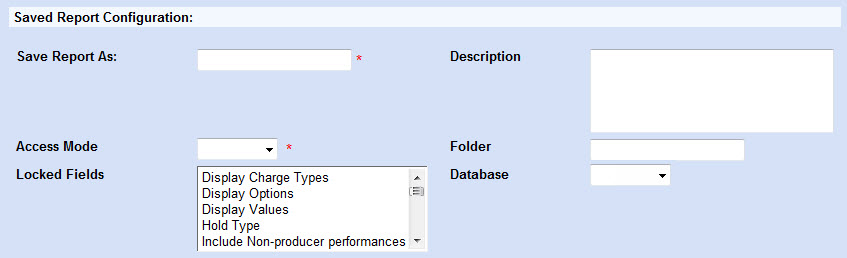
The Saved Report Configuration section of the Saved Reports|Parameters page contains the following properties:
Field |
Description |
Save Report As |
Enables you to enter a name that you want to save the report criteria under. |
Description |
Enables you to write a description or summary of the report. |
Access Mode |
Enables you to specify the accessibility of the report: •Private: Only the creator can edit, delete, view or run the report. •Public: Anyone can edit, delete, view or run the report. •Readable: Anyone can view or run the report. Only the creator can edit and delete the report. |
Folder |
Enables you to enter the folder name which the report is stored in. |
Locked Fields |
Enables you to select which fields you would prefer to have locked in the saved report. The available options are dependent on which report you are working with. |
Database |
Enables you to specify the database from which the report comes from. |
The Schedule Saved Report Section
The Schedule Saved Report section allows you to configure when to run/how to send the report. It allows you to specify details such as to where, whom, when and how often the report will be run/sent. For more information, refer to Scheduling a Report to Run at Regular Intervals.
The following image illustrates the Schedule Saved Report section of the Saved Reports|Parameters page with Email has been selected from the 'Target' dropdown:
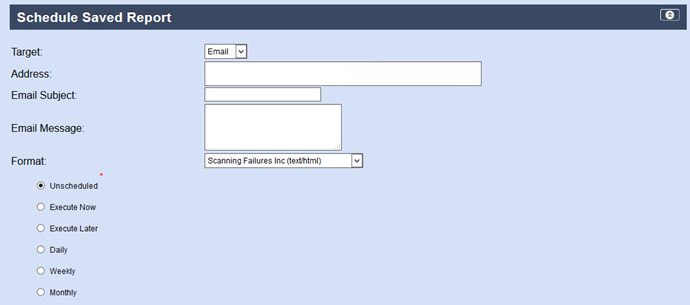
The Schedule Saved Report section of the Saved Reports|Parameters page contains the following properties:
Field |
Description |
Target |
Enables you to select how the report will be displayed/saved: •Email: Allows you to email the report to a recipient. •HTTPS: Allows you to save the information to a secure server. •Print: Allows you to print the report on a designated printer. •SFTP: Enables you to save the report to an FTP service. The delivery of the report will be secured/encrypted. |
Address |
Enables you to enter an email address (or URL if you are using a 'Target' of SFTP) where the report will be sent, if applicable. You can enter multiple email addresses by pressing ENTER or TAB after each one, or copying/pasting a number of address separated by semicolons (;). Each email appears on its own line with an X next to it to make removing it easy. Double-click an address to edit/see the entire address. This field has a 1,000 character limit. If you are using SFTP enter the full URL, including the folder path or home directory. If you are using HTTPS, enter the IP address or full URL, including the port and folder path. Clicking After you save the report, the field will display |
Email Subject |
Enter a subject line for the email message, if applicable. This field only appears if Email was selected from the 'Target' dropdown. |
Email Message |
Enter a message that will appear in the body of the email, if applicable. This field only appears if Email was selected from the 'Target' dropdown. |
Target File Name |
Enter name that you want the file to saved as. If you can add the following to the file name: •%d: The date will be added to the file name in the YYYYMMDD format. •%t: The time will be added to the file in the HHMMSS format. This field only appears if SFTP or HTTPS are selected from the 'Target' dropdown. |
Target User Name |
This field only appears if SFTP or HTTPS are selected from the 'Target' dropdown. •SFTP: Enter the user name for the FTP site you will be using. •HTTPS: Enter the user name for the server that you will be using. |
Target Password |
This field only appears if SFTP or HTTPS are selected from the 'Target' dropdown. •SFTP: Enter the password for the FTP site you will be using. •HTTPS: Enter the password for the server that you will be using. |
Printer |
Enables you to select which printer the report will be printed from. This field only appears if Print was selected from the 'Target' dropdown. |
Format |
Enables you to select how the output format of the scheduled report. The name that appears before the format type is dependent on the report that you are working with: •(text/CSV): Create the report in a Comma Separated Value (CSV) format. This format enables you to view the report in such applications as Microsoft Excel. •(text/html): Creates an HTML version of the report. •(text/avdocument): Creates a PDF version of the report. |
Schedule Options |
Enables you to schedule when the report will be run/sent to the report's associated email address, if applicable: •Unscheduled: Saves the report as a draft copy prior to finalization and sending. •Send Now: Sends the report to the recipients immediately. •Send Later: Sends the report to the recipients at a pre-defined date and time. •Daily: Sends the report to the recipients daily at a specified time. You are able to define the start and end dates that are valid for the daily mail-out. •Weekly: Sends the report on a specified day or days of the week as well as a specific time during that day. You are able to define the start and end dates that are valid for the weekly mail-out. •Monthly: Sends the report on a specified day of the month as well as a specific time during that day. You are able to define the start and end dates that are valid for the monthly mail-out. |

