|
Hint Contact your customer success manager before enabling 3D seat views. Before this functionality can be used, a 3D model of your venue will have to be created by a 3D venue mapping company (Ticketing3D). |
|
Warning Do not insert widgets within the form of an article. An error will cause the article to not appear online. |
The 3D Digital Venue (3DDV) allows you to include a 3D modeled venue in articles to show customers the views from different seats.
To build and insert the 3DDV widget:
1.Open Content Management from the Desktop.
2.Select the Articles tab.
The Articles|Search page appears.
3.Search for and select the article that you want to work with.
The Articles|Basic page appears.
4.Select the Text tab.
The Articles|Text page appears.
5.Click 'Insert Widget'.
6.Select 3DDV Widget from the dropdown.
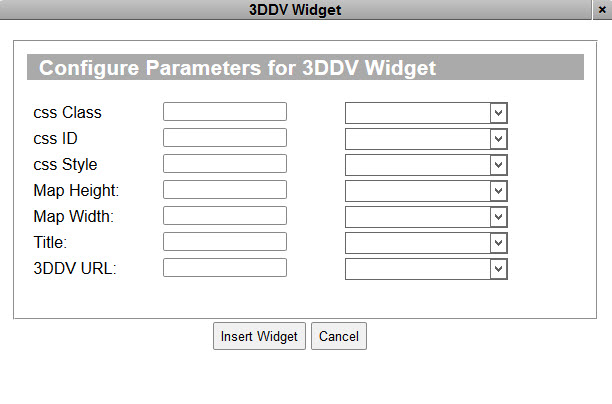
The 3DDV Widget dialog box appears:

7.Complete the following fields:
▪css Class: Enter any applicable CSS class information (with no spaces) in this field.
▪css ID: Enter any applicable CSS ID information (with no spaces) in this field.
▪css Style: Enter any applicable CSS styles that you want to apply to the login widget (background:blue,color:white).
For more information, refer to Branding.
|
Caution If you do not enter any information in the fields below, they will be blank online. |
▪Map Height: Enter the height that you want the venue map to appear, in pixels.
▪Map Width: Enter the width that you want the venue map to appear, in pixels.
▪Title: Enter the name that you want to appear for the venue map.
▪3DDV URL: Enter your organization's Ticketing3D URL in the '3DDV URL' field.
For information regarding the 'Context Type' dropdowns that appear next to each of the parameter fields, refer to Using Context Types for Widget Parameters.
8.Click 'Insert Widget'.
The 3DDV widget is inserted in the article text.
9.Click 'Apply'
A window confirms that the article was updated.
10.Click 'OK'.
|
Hint To change any of the labels that appear in the Configure Parameters for 3DDV Widget dialog box, navigate to the Registry - Registry::EN::Application::Content Management::Widgets::3DDV Widget node. |


