|
Warning Do not insert widgets within the form of an article. An error will cause the article to not appear online. |
The following image illustrates what the Calendar Widget will look like online:

To allow Online users to select dates from the calendar widget, the searchEventDays permission must be enabled for the TSContentBO for the WebSales and Anonymous WebSales group.
When a customer clicks on a date in a calendar widget that has been inserted in a:
•Body Article: The 'Article Search' article defined on the Articles|Basic page is used to display the results.
•Feature Article linked to Body Article: The 'Article Search' article assigned to the Body article is used to display the results.
If nothing is assigned to the 'Article Search' on the Article|Basics page, the one on the Sites|Branding page is used.
To insert the Calendar widget:
1.Open Content Management from the Desktop.
2.Select the Articles tab.
The Articles|Search page appears.
3.Search for and select the article that you want to work with.
The Articles|Basic page appears.
4.Select the Text tab.
The Articles|Text page appears.
5.Click 'Insert Widget'.
6.Select Calendar Widget from the dropdown.
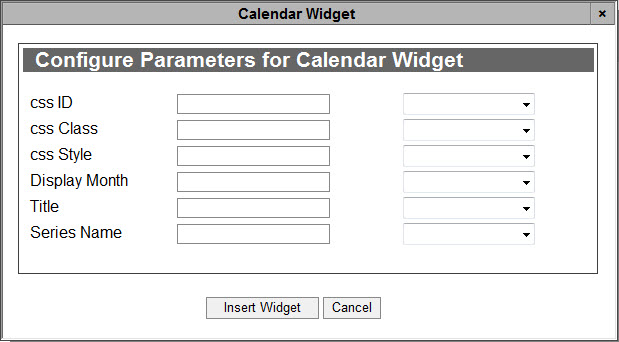
The Calendar Widget dialog box appears:

7.Complete the following fields:
▪css Class: Enter any applicable CSS class information (with no spaces) in this field.
▪css ID: Enter any applicable CSS ID information (with no spaces) in this field.
▪css Style: Enter any applicable CSS styles that you want to apply to the video widget (background:blue,color:white).
For more information, refer to Branding.
▪Display Month: This field is not currently in use.
▪Title: Enter the name that you want to appear for the calendar.
▪Series Name: Enter the name of the series that you want to highlight in the calendar.
For information regarding the 'Context Type' dropdowns that appear next to each of the parameter fields, refer to Using Context Types for Widget Parameters.
8.Click 'Insert Widget'.
The Calendar widget is inserted in the article text.
9.Click 'Apply'
A window confirms that the article was updated.
10.Click 'OK'.
|
Hint To change any of the labels that appear in the Configure Parameters for Calendar Widget dialog box, navigate to the Registry - Registry::EN::Application::Content Management::Widgets::Calendar Widget node. |

