|
Warning Do not insert widgets within the form of an article. An error will cause the article to not appear online. |

Before you can use the Google Maps Widget you must add a 'Google Map API Key' to the Registry - Registry::EN::Application node. To obtain a key, visit Google Static Maps API and click 'Get a Key'.
To build and insert the Google Maps Widget:
1.Open Content Management from the Desktop.
2.Select the Articles tab.
The Articles|Search page appears.
3.Search for and select the article that you want to work with.
The Articles|Basic page appears.
4.Select the Text tab.
The Articles|Text page appears.
5.Click 'Insert Widget'.
6.Select Google Maps Widget from the dropdown.
The Google Maps Widget dialog box appears:
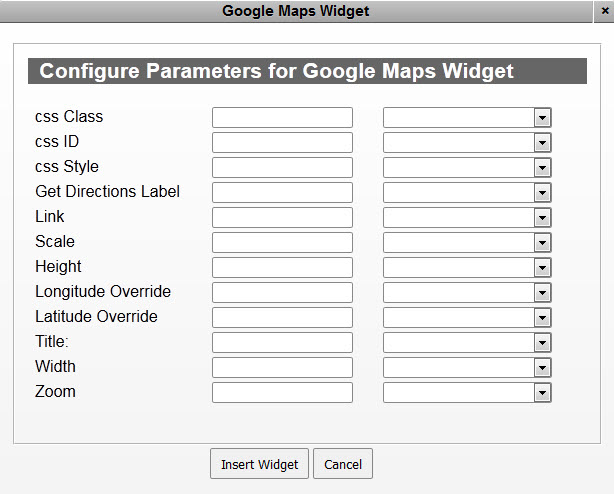
7.Complete the following fields:
▪css ID: Enter any applicable CSS ID information (with no spaces) in this field.
▪css Class: Enter any applicable CSS class information (with no spaces) in this field.
▪css Style: Enter any applicable CSS styles that you want to apply to the Google Maps widget (background:blue,color:white).
For more information, refer to Branding.
▪Height: The height of the map defined in pixels. By default, this is set to 332px.
▪Latitude Override: Enter the latitudinal coordinates (in decimal degrees) of the location that you want to map.
For information about finding the latitudinal coordinates for a location, refer to Determining the Latitude and Longitude of a Location.
▪Scale: Determines the resolution of the map image while retaining the same coverage area and level of detail. Acceptable values are 1 and 2 (4 is available to Maps API for Business customers). This is set to 1 by default.
▪Title: Enter the name that you want to appear for the Google Map.
▪Zoom: Determines the magnification level of the map. The lowest level of magnification is 0 (the world map), and the highest is 21+ (individual buildings).
▪Link: Determines whether or not the Get Directions links will appear along with the map. When users click the link they will be redirected to Google Maps, allowing them to search for directions to the venue. Enter true to display the link (this field is case sensitive).
▪Get Directions Label: Enter the text that you want to appear for the 'Link'. If this is empty, the default text will be get directions.
▪Longitude Override: Enter the longitudinal coordinates (in decimal degrees) of the location that you want to map.
For information about finding the longitudinal coordinates for a location, refer to Determining the Latitude and Longitude of a Location.
▪Width: The width of the map defined in pixels. By default, this is set to 700px, which expands to 100% of the width of the parent container.
For information regarding the 'Context Type' dropdowns that appear next to each of the parameter fields, refer to Using Context Types for Widget Parameters.
8.Click 'Insert Widget'.
The Google Maps widget is inserted in the article text.
9.Click 'Apply'
A window confirms that the article was updated.
10.Click 'OK'.
|
Hint To change any of the labels that appear in the Configure Parameters for Google Maps Widget dialog box, navigate to the Registry - Registry::EN::Application::Content Management::Widgets::Google Maps Widget node. |

Determining the Latitude and Longitude of a Location
To find the latitudinal and longitudinal coordinates of a location:
1.Navigate to Google Maps.
2.Search for the location that you want to map.
3.Right-click on the Google Map marker ( ).
).
4.Select What's here?.
The latitudinal and longitudinal coordinates appear in the Google search bar.
The latitude is the first number, and the longitude is the second number.